


How To Tips & Hints
In this section we will provide information which will help you work with the products that Model Builders Supply manufacture and distribute. Most of the information will be targeted at basic level model making technique from which more advanced technique and skill can readily develop.
- Finishing Plastic Patterned Sheets
- Painting Clear Bathroom Fixtures (reverse finishing)
- Make a Basic Shell & Tub Surround
- Working with MBS Landscaping Materials
- Model Making
- Selecting the right scale for your project
- Plastic Construction Basics
- Molding & Casting
- Scale Conversion Charts
- The Best Adhesive for the job
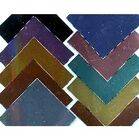
Finishing Plastic Patterned Sheets
READ ALL INSTRUCTIONS FIRST, then go back and pick the right technique for your application. It is recommended (in most cases) that Model Builders Supply plastic patterned sheets be painted prior to cutting and installation. This allows much greater freedom during the painting process and more uniform appearance of the finished material. Following installation, a few touch-ups along joints and edges may be required. Paint used should be flat acrylic and thinned with water. If applying a solid colour to change the underlying plastic colour, only a small amount of thinning is required if any. At the other extreme, a faint finishing wash requires a very watery mix (1 part paint to 3-5 parts water). The thinner the paint mix, the more the underlying colours will show through, adding depth and realism. Experiment on the backside of the sheet to get consistency of paint and to achieve the kind of finish you desire. How To Tips - Patterned Sheets PDF
ROOFING:
PAINTING:
(Instructions for RS, RTI, SLT, SRT & RCT codes)
Paint the sheet a solid colour or leave it its original colour. Let dry. Randomly paint shingles with a deeper tone of the underlying colour, Let dry. Choose 1 or 2 accent speckling colors and follow instructions for SPECKLING. You will probably skip the speckling step for tile roofs SRT & RCT.
(Instructions for wood shake, WSRS codes)
Paint the sheet a light wood colour and choose 2 darker accent colors and water them down slightly. Using a dry flat bristle brush (½”) dip into the lighter of the 2 accent colors and dab excess paint onto a paper towel, then brush upwards on the shingles creating a wood grain weathered look. Repeat with next colour. Use the Tinting method for further effects.
BRICK, BLOCK or STONE:
PAINTING:
Randomly paint bricks or stones (2-3 complementary colours of flat acrylic paint), with a #4 flat paint brush, leaving about half unpainted. Depending on the desired finish, this step can be done before or after grouting.
GROUTING:
Make a thin paint wash for grout colour (1:2 paint & water) and apply with a 2 or 3" foam brush, making sure paint goes into all grout lines. Leave for approx. 3 minutes then remove excess paint by dragging a ruler wrapped in paper towel across the surface (for heavily textured patterns don't use the ruler). Tear off the wet piece of towel to expose a fresh piece and continue until desired effect is achieved. OR
For very realistic mortar effects spread Surpatch Spackling compound (mix with paint for coloured grout) on the sheet with a dense sponge or your fingers, getting in all the grout lines, then wipe off excess with slightly damp rag or paper towel. Leaving some residue actually gives a realistic aged effect. Depending on the desired finish, these steps can be done before or after painting, or as the only step. Practice on a spare piece of the sheet.
SPECKLING, TEXTURING & TINTING

adds a further texturing dimension and is typically used on roof shingles and stone based patterns to give an aggregate look. It can also mute any overpowering colours. Use spray paint (greys & black work well), lay the sheet flat and spray a light dusting from 16-20" away,spray back and forth over sheet in a constant slow movement until desired effect is achieved, (use in a well ventilated area).
If spraying is not possible, dip a toothbrush in paint and flick your thumb across the bristles aiming at the sheet.
Texturing can add depth and realism to stone work.
Dip a sponge in a complimentary colour and dab on paper towel to remove excess paint. Lightly pat the sponge on the stones until you like what you see, let dry, then repeat with another colour, if desired.
You may want to apply a very thin wash of paint with a foam brush over the entire sheet to give it an aged look.Grays will lighten slightly, where as brown tones will give a rustic look. To achieve an all over transparent brown tint, take a small amount of burnt umber paint on a damp rag and rub onto the dry painted sheet a little section at a time, then buff it.
TILE

 PAINTING:
(Instructions for SQ-__clear codes)
Clear Tile, Reverse Painting, is a great way to get custom results with a scratch resistant finish. All the painting is done on the side that faces down, when glued. Paint in layers starting with the accent colour or pattern you want to see as the top of the tile. Let dry, then paint the backing colour. IE; if you want pink & white flowers with a burgundy background, paint all the flowers first in layers: flower center 1st then petals etc., let dry, then paint over the flowers with the burgundy. This method can also be used on MBS clear bathroom tubs, sinks, hot tubs, toilets etc.
Marbling:
Choose 3 complimentary colours and sponge on in layers one colour at a time, usually with the darkest colour going last. (A sea sponge works great for this). Fine veins can be achieved with a very fine brush by rolling the brush between your fingers while dragging it along the tile. This should be done first before background sponging.
Masking:
Mask the row or individual tiles with masking tape securely. Now spray or brush on your main colour and let that dry. Carefully peel off the tape and you will be left with a clear section. If you want a multi-coloured border you can do more masking at this point. Brush or spray the clear area, don't worry about staying in the lines, you won't see anything but the masked area on the other side. Now repeat for additional colours.
(Instructions for SQ-__red codes)
Terra Cotta:
Choose a grouting method and do this before or after painting. Cut a dense sponge to match square tile size (1”, ¾” etc.), choose 2 accent colours (ie: deeper rust, mustard, brown etc.) slightly watered. Now dip square sponge in paint and dab on each tile, and then repeat with the second colour while first colour is slightly wet.
(Instructions for SQ-__ any colour)
Granite Fleck Tile:
Paint entire sheet first or leave in natural state, then do grouting. Now choose a colour for speckling and follow Speckling instructions.
GENERAL
CUTTING:
Using a sharp Xacto knife, make one firm cut on the top side (don't go right through) and the sheet will always break precisely along the incision whether straight or curved. Scissors can be used for more basic cutting. For sheet to sheet matching, carefully knife around bricks or stones etc. so matching is made less obvious.
BENDING:
To fold around corners, use a straight piece of wood or a table edge to make a fold in the sheet. Squeeze gently up & down the fold until the desired angle is achieved. Warming the area of the fold with a hair dryer can help. Glue in place using the aid of tape or clamps if necessary.
GLUEING:
For deep patterns and corner glueing, use MBS GLOOP or silicon adhesive, spread evenly and fully to edges, press sheet into place, clamp if necessary. For flat sheets, use MBS STICK'M adhesive sheets, MBS GLOOP, spray adhesive or WELDBOND adhesive.
TIPS:
* If you don't like what you've done, let it dry then sand off the uppermost features of the sheet and start over.
* Try using Fleck Speckle paint for a really rough stone finish.
* Use cut outs from your miniature wallpaper, facing out through the tile. Glue with Weldbond, it dries clear.
* If paint is too dark dab it with a paper towel while it's still wet.
* Too much for you? Pre-finished painted sheets are available in 1:12 & 1:24 scales

Your imagination is your best tool, experiment & have fun. Ask us for a sample piece so you can experiment.
MBS manufactures over 200 different designs, colours & scales of 3D plastic patterned sheets.
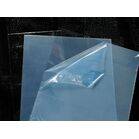
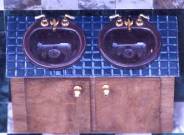
Painting instructions for clear fixtures ( tubs, sinks, toilets & hot tubs)
Get a Designer look!!
 Use acrylic paint - flat or glossy, it will always show through as glossy, with a scratch resistant finish. Brush or spray paint on the under side (reverse), brush strokes won't show on the good side. To make designs: (flowers, checkers, speckles etc.),
1. Paint design in layers (ie: center of flower, then petals etc.), let it dry,
2. Paint the solid colour over the design, all on the reverse side.
3. To glue fixture (tub etc.) in place: use Silicone adhesive, Weldbond or a glue that won't attack the paint.
4. For a realistic drain use a CIRKIT eyelet or dab gold or silver paint in the drain spot.
5. Now finish off by adding Model Builders Supply faucets in silver or gold.
How To Tips - Painting Clear Fixtures PDF


 For Hot Tubs:
Try using the spray on Fleck stone paint (also painting on the reverse side of tub) it shows through as the common real life hot tubs with the flecks being of realistic size & texture. You will probably need two coats, as it dries a little pitted. You can also paint a solid paint colour over your first Fleck coat once it is completely dry. The Fleck paint takes longer to dry than regular acrylics.
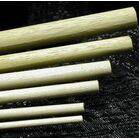
Stained Glass
Plastic Panel Painting
Using Model Builders Supply stained glass window panels allows you to cut these plastic panels to size and fit into window/door frames or use them in front of an existing window hanging in a frame.
Easy to use:
Fill in the grooved side of the lines (for led) with a permanent fine tip marker by following grooves like a track. Flip the panel over and colour the other side in with transparent (or opaque) paints or permanent markers. Now cut to size using a craft knife or scissors and secure in an opening or picture frame. Experiment with your colours on an extra side piece of the panel.
How To Tips - Stained Glass PDF


Make a Basic Shell & Tub Surround
As you probably know by now, plastic is very easy to work with. The best material to make the base from is styrene. Start by getting the real measurements and scale down to size. We'll make a 48” wide vanity in 1:12 scale to illustrate. A typical size would be 30"hx20"d with a 2" overhang at the front. Make sure you allow for the thickness of the material when sizing. You'll need an Xacto knife, steel ruler, solvent cement, brush and a square.
 CABINET:
Cut the bottom pieces (2 sides 1 front 1 back) out of .060” (1/16”) styrene, just one scribe line on the surface and it will break along that line. Align 2 side pieces to make an ”L” and apply a small amount of solvent with a paint brush to the inside of seam, letting it drip down the seam line (make sure the front and back panels cover the edges of the sides). Leave for 5 minutes before proceeding. Cut out door fronts and line up on front of cabinet then apply solvent cement.
 TOP:
TOP:
Cut the top out of .040” styrene. If you want to put a tile top on you can cut the holes for the sink in the tile now at the same time as the styrene top. The sink holes don't have to be perfect, as long as the sink fits, the sink ridge will cover the cut line.
Glue the styrene top on the base with solvent, lining up back & sides, leave the overhang at the front. Now you can paint the base, the tile top (see painting patterned sheets) and the sink, if required (see painting instructions for clear fixtures).
Once everything is dry, you can attach the tile top to the .040” top using Model Builders Supply STICK'M adhesive sheet, also cut out a sink hole. Put the MBS faucets on the sink with CA glue then apply a small amount of silicone adhesive, Weldbond or a tacky glue (that won't attack the paint) to the underside of the sink and drop into place.
Same methods apply to kitchen cabinets, Bath/Hot tub surrounds, Step up tubs, patio settings etc.
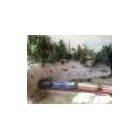
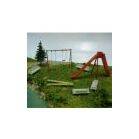
Working with MBS landscaping materials
In scale modeling of dioramas, model railroad layouts, architectural models, gaming boards and even dollhouse miniatures, the way scenery and landscaping is done can "make or break" the whole finished effect.
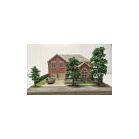
The type of model, or its use, often dictate quite varied approaches. For example: an architectural model for institutional, commercial or industrial projects will usually not dwell on landscaping features, but rather focus more on the building design, with some focus on entrances, access routes or other aspects specific to the function of the building or complex.
Residential buildings and complexes on the other hand, invariably place a significant emphasis on the landscaping and environmental conditions around the site. This is especially true if the model is to serve as a promotional and marketing tool for selling, leasing, renting or financing.
There are as many techniques to model making as there are people applying them, so we will just pass on a number of tips and methods that are in general use, then you can adapt and apply them to your particular model for the effect you want to achieve.
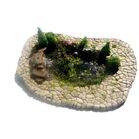
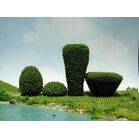
Grasses, ground cover & bushes:
Paint the area to be landscaped with a similar colour as the foliage or choose a ground colour paint, and allow to dry then apply Weldbond adhesive, or for a one step process, use Model Builders Supply GLOOP adhesive or Weldbond tinted with paint to the colour you desire, then apply to the area to be landscaped.
Then on wet surface, sprinkle on the grass/groundcover and pat lightly onto the surface, shake off excess to be re-used. For large bushes, apply a generous amount of GLOOP or silicone adhesive on the area and place foliage, to build up layers, apply adhesive on existing foliage and between layers of foliage until desired height is achieved.
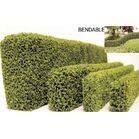
To glue pre-made bushes and hedges down, use GLOOP or silicone adhesive.
to glue gravel, apply a generous amount of Weldbond or a layer of GLOOP (tinted if desired) on the area to be covered and add gravel, patting lightly into place.
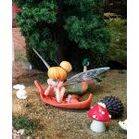
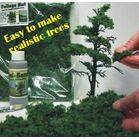
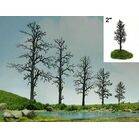
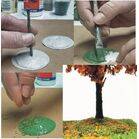
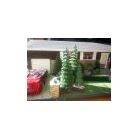
Making Realistic Trees
 To create different species, we suggest clipping and twisting branches on the armature, the tree armature can also be painted for different types (ie white for birch etc.). Once the shape has been created, coat branches with tinted GLOOP (color of branches or foliage) a couple at a time. Apply Model Builders Supply foliage a little at a time until desired look is achieved. Different colours and textures can also determine different species.
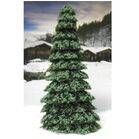
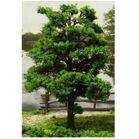
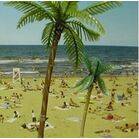
MBS also makes pre-made trees for those of you with limited time.


Model Making
 In 1957 model building in Canada was rather crude, with architectural models made mostly from card and balsa wood. Engineering models were built from wire, discs, turned wood, cardboard tubes and strip wood structures. Plastics were only just emerging. Keith Day (President of Model Builders Supply) was a pioneer in evolving and developing the sophisticated methods and techniques that today are widely adopted. Scale models are still the most effective and instant way of communicating a concept, in spite of the advances in computerization.
In engineering process design, it is almost unheard of not to construct a physical three dimensional model of any consequential project. The model naturally becomes the focal meeting and proving point for the design of all disciplines, within the constraints of priority for space, accessibility, construction sequencing and function. In this context the esthetics are a minimal consideration, but accuracy is paramount.
In architecture, the considerations are much more concerned with form and esthetics as well as function. Therefore, in many aspects of architectural model making, surface texture and colour also play an important role. Models are used for many reasons in many industries for: Architectural, Engineering, Interior design layout, Displays & Prototypes, Forensic, Special Effects for Film & TV, Medical and more.
Selecting the right scale to work in
 In projects such as these being discussed, it is preferable that plans, sections and elevations be drawn at the same scale as the intended model.It is not mandatory, but it makes understanding the model implications and interpretation easier.
What scale?
Your project may well have this pre-specified, but the following are the most commonly used scales for particular types of projects.
As there is no universal agreement on the use between imperial or metric measurement, we will quote both, using the closest comparisons. An example would be 1:50 or ¼"=1 foot (which is of course 1:48).
While you will build specifically to one or other in terms of building dimensions, there are many pre-manufactured parts, materials, supplies and accessories, such as those manufactured by MBS ( Model Builders Supply ) that you may employ for your model, where the difference between the Imperial and metric scales is so small that no distinction is made.
Examples would be, brick stone, people vehicles, furniture and scenic accessories.
It is very common when first making a model to over visualize the correct size for brick, roof, windows etc. It is important that you use the proper scale items because they are important to the viewer's correct comprehension for the scale of the project. That is often why people and cars are put on models, to reinforce the scale relationship, as well as to focus on entrances, activity areas and traffic patterns.
RESIDENTIAL SINGLE FAMILY BUILDINGS
The most widely used scale is 1:50 (¼"=1' or 1:48) because it is large enough to portray the detail aspects without the entire mass becoming overwhelming and physically unmanageable. In model making, there are probably more standard items at this scale than any other. If your project were to include any extent of exterior landscaping you may need to drop the scale to 1:100 (1/8"=1') in order to keep the base size manageable, 2'x3' is about as big as you would want a base size. There are also many "off the shelf" items for this scale, but not as many interior items, if that was a consideration. Where interior detailing is a requirement 1:24 (½"=1') scale is the most widely used.
Where interior decorating is the specific requirement and style as well as texture and spatial arrangement are important, you may choose to go with 1:12 (1"=1'), which is the universal scale for dollhouse and miniaturists.Just about anything is available. The obvious drawback of this scale is cost due to the size.
COMMERCIAL / INDUSTRIAL BUILDINGS
Scales of this type of projects are usually somewhat smaller than for house models, mainly because the structures involved are usually much more expensive in plan and general mass.
It is rare for models in this category to be larger then 1:100 (1/8"=1'). The most popular scales are 1:200 (1/16"=1') followed by 1"=20' and 1"=30' where imperial scales predominate.
SITE PLANNING & OVERALL DEVELOPMENT or REDEVELOPMENTS
As these models cover large areas and are usually built to show the relationship of building masses and road pattern, the scales are much smaller.
The most commonly used scales are 1:500 or in imperial 1"=40' or 50'. On very extensive projects the scales may drop to 1:1000 or 1"=100'. Buildings are normally shown in overall block mass form with no detailing or colouring. Trees and landscaping features are often shown relatively stylized. Vehicles are used to show traffic flow and parking situations as well as identifying a scale relationship.
LANDSCAPE ARCHITECTURE MODELS
Often landscaping design is included in an overall model. However, landscape architecture being an identifiable discipline itself, will frequently require the designer to construct a specific model. The scales can be quite varied. For a median residential project it is quite conceivable that 1"=1' may be used. As the overall size expands it can drop to a scale as small as 1:200 (1/16"=1').
INTERIORS / THEATRICAL SETS / SECTIONAL STUDIES
These models focus on a series of detail elements within a larger structure, about which we are not concerned. As we are dealing with wall coverings, floors, furnishings, plants and specialty design items composed into a design entity, it demands a size large enough to clearly convey the message. There are many pre-manufactured components at 1:24 (½"=1') which is probably the most widely used for these functions.
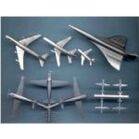
HOBBY MODELING
In hobby modeling there are numerous scales that are common for many applications such as aircraft and ship modeling, 1/72 and 1/144 being typical. Military modelers commonly use 1:35. Model railroaders use a host of scales that are primarily predicated on the gauge of the track. The best known are HO (1:87), N (1:160) and O (1:48). Static car models come in numerous scales, 1:32, 1:24 and 1:16 being most popular.
War gaming uses yet another designation for its scales; these are termed 27mm or 54mm etc. In many cases the scales have been determined by manufacturers to assure matching of their products.
Do not use a scale that is smaller than that which is most suitable for the project in order to save materials expense. It's better to maintain the preferred scale and tailor the budget to suit.
Plastic Construction Basics
 Plastics are used so extensively because they are easier, faster and cleaner than wood, card or metal. Also excellent paint finishes are so quickly achieved, usually without primer or painstaking sanding and filling. Polystyrene and acrylics bond readily to each other cleanly and without residue, in a few seconds, by using MBS solvent cement.
The basic shell of a small scale model would most likely be made of acrylic, either clear or coloured, then the brick, stone or choice of cladding would be applied after window and door openings have been cut out of the cladding. This makes it much easier to achieve quick windows rather than trying to cut openings and fill with acrylic.
If the building is to be a solid glass representation, then mullions would be added to the acrylic rather than cladding.
Watch for our on line model making manual, coming soon!
Working with Molding & Casting Materials
Molding & Casting products offer many interesting and exciting opportunities for the hobby and vocational user as well as cottage and small industry applications. Inventors and prototype makers now have a whole new set of options to help achieve their goals.
You probably have an original (or need to make one) that you want to reproduce. It must be recognized that the reproductions will be exact duplications of the original in detail, surface texture, size and configuration: good, bad or indifferent!
The user should take all precaution through process of evaluation and experimentation before committing expensive or irreplaceable items to a project. Research, experience and perseverance are important aspects to producing good molds and castings.
Don't be afraid to jump in for fear of making mistakes, it's the best way to learn and you will make some bad parts regardless, so plunge in and do it. It's not that difficult and it really is lots of fun.
Once you get results you will start to search out new projects, you are only limited by your imagination.
There are just far too many variables to list particular tips & hints in this field, so we recommend the MBS manual (MAN-M2) for virtually everything you need to know about molding & casting:
Mold Boxes * Embedments * 2 part molds * Mixing Ratios * RTV Molds * Proper containers to use * Technical info * Trouble Shooting * Storage Info * Making Masters * Castings * Safety Data * Inhibitors * Dyes * Ideal Molding Temperatures * Fillers * Compatibles * Pouring * Catalysts
And hundreds of invaluable instructions, tips & hints that will get you started in this very exciting hobby.

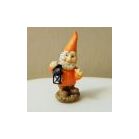
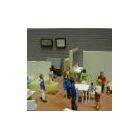
 This apple was made as a decorative accessory for a kitchen wall treatment. The original was made out of Cernit then baked in the oven to a hard finish. An RTV mold was then made and cast in Alumilite liquid resin. The final product was painted with acrylic paint to match the other décor in the kitchen.
Original and moldings by Susan Jeschke and Dan Miller respectively.
Scale Conversion Charts
Railroad Scales
| Gauge | Ratio | Scale (feet) | Scale (metric) |
| Z | 1:220 | 1/18” =1’ | 1.38mm = 305mm |
| N | 1:160 | 1/13” =1’ | 1.90mm = 305mm |
| HO | 1:87 | 1/7” =1’ | 3.50mm = 305mm |
| S | 1:64 | 3/16” =1’ | 4.80mm = 305mm |
| O, 1/4 | 1:48 | 1/4” =1’ | 6.30mm = 305mm |
| #1 | 1:32 | 3/8” =1’ | 9.50mm = 305mm |
| G, 1/2 | 1:24 | 1/2” =1’ | 12.7mm = 305mm |
Scale Equivalents
| 1” = 100’ | 1:1200 |
| 1” = 75’ | 1:900 |
| 1” = 60’ | 1:700 |
| 1” = 50’ | 1:600 |
| 1” = 40’ | 1:500 |
| 1” = 30’ | 1:400 |
| 1” = 20’ | 1:250 |
| 1” = 10’ | 1:125 |
| 1/32” = 1’ | 1:400 |
| 1/16” = 1’ | 1:200 |
| 3/32” = 1’ | 1:125 |
| 1/8” = 1’ | 1:100 |
| 3/16” = 1’ | 1:75 |
| 1/4” = 1’ | 1:50 |
| 3/8” = 1’ | 1:32 |
| 1/2” = 1’ | 1:24 |
| 3/4” = 1’ | 1:16 |
| 1” = 1’ | 1:12 |
| For modeling purposes, the closest standard scales used are quoted. For individual part scaling, the variations are indistinguishable. Do not however, allow variables to become cumulative when converting. |
Architectural Conversion Chart
| Imperial |
Decimal
Equivalent
|
1/32”=1’
Inches
|
1/16”=1’
Inches
|
1/8”=1’
Inches
|
1/4”=1’
Inches
|
| .012” | .012 | 4.608 | 2.304 | 1.152 | .576 |
| .020” | .020 | 7.680 | 3.840 | 1.920 | .960 |
| 1/32” | .031 | 12.00 | 6.00 | 3.00 | 1.50 |
| .040 | .040 | 15.360 | 7.680 | 3.84 | 1.92 |
| 3/64” | .049 | 18.80 | 9.40 | 4.70 | 2.35 |
| 1/16” | .062 | 24.00 | 12.00 | 6.00 | 3.00 |
| 5/64” | .078 | 30.00 | 15.00 | 7.50 | 3.75 |
| 3/32” | .093 | 36.08 | 18.04 | 9.02 | 4.51 |
| 1/8” | .125 | 48.00 | 24.00 | 12.00 | 6.00 |
| 5/32” | .156 | 60.08 | 30.04 | 15.02 | 7.51 |
| 3/16" | .187 | 72.00 | 36.00 | 18.00 | 9.00 |
| .200 | .200 | 76.80 | 38.40 | 19.20 | 9.60 |
| 1/4” | .250 | 96.00 | 48.00 | 24.00 | 12.00 |
| 5/16” | .312 | 120.00 | 60.00 | 30.00 | 15.00 |
| 3/8” | .375 | 144.00 | 72.00 | 36.00 | 18.00 |
| .400 | .400 | 153.60 | 76.80 | 38.40 | 19.20 |
| 1/2” | .500 | 192.00 | 96.00 | 48.00 | 24.00 |
| 3/4” | .750 | 288.00 | 144.00 | 72.00 | 36.00 |
| 1” | 1.000 | 384.00 | 192.00 | 96.00 | 48.00 |
| SIZE IS EVERYTHING |
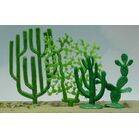
 In scale modeling of dioramas, model railroad layouts, architectural models, war gaming and even dollhouse miniatures, the way scenery is done can make or break the whole finished effect. Make sure when choosing your landscaping, you choose trees that are appropriate for the scale you are working in. Many different size trees can be put onto one model in one scale. For that reason we do not label scales on our trees. Use this handy chart to determine the life size of the tree in the scale you are using. Scales given are combined to include railroad & architectural scales, so sizes are somewhat approximate. In scale modeling of dioramas, model railroad layouts, architectural models, war gaming and even dollhouse miniatures, the way scenery is done can make or break the whole finished effect. Make sure when choosing your landscaping, you choose trees that are appropriate for the scale you are working in. Many different size trees can be put onto one model in one scale. For that reason we do not label scales on our trees. Use this handy chart to determine the life size of the tree in the scale you are using. Scales given are combined to include railroad & architectural scales, so sizes are somewhat approximate. |
 |
The best adhesive for the task |
| The following chart is intended to provide general guidance in the choice of adhesives. The characteristics of the actual materials involved can vary: it is up to the modeler to determine which adhesive does the job best for them. In general, it is advisable to test adhesives on scraps of material before moving on to the - more critical - modeling task. It is important to note that some materials, for example polyolefins (polyethylene and polypropylene) cannot be bonded at all. 1= best |
| Application | Solvent cement | Plastic-weld | Super glue | Epoxy | Weldbond | Silicon | Stick’m | Gloop |
| Plastic to plastic | ||||||||
| Styrene-styrene | 1 | 2 | 4 | 3 | 4 | - | - | - |
| Styrene-acrylic | 1 | 2 | 3 | 4 | 4 | - | - | - |
| Styrene-copolyester | - | - | 1 | 2 | 4 | - | - | - |
| Styrene-butyrate | 2 | 1 | 4 | 3 | 4 | - | - | - |
| Styrene-ABS | 1 | 2 | 3 | 4 | - | - | - | - |
| Acrylic-acrylic | 1 | 2 | 3 | 4 | - | - | - | - |
| Acrylic-copolyester | - | - | 1 | 2 | - | - | - | - |
| Acrylic-butyrate | 2 | 1 | 4 | 3 | - | - | - | - |
| Acrylic-ABS | 1 | 2 | 3 | 4 | - | - | - | - |
| ABS-ABS | 1 | 2 | 4 | 3 | 4 | - | - | - |
| ABS-copolyester | - | - | 1 | 2 | - | - | - | - |
| ABS-butyrate | 2 | 1 | 4 | 3 | - | - | - | - |
| Copoly-copoly | 1 | 2 | 3 | 4 | - | - | - | - |
| Other materials | ||||||||
| Wood-wood | - | - | 3 | 2 | 1 | - | - | - |
| Wood-plastic | - | - | 2 | 3 | 1 | - | - | - |
| Wood-metal | - | - | 2 | 3 | 1 | - | - | - |
| Wood-glass | - | - | 2 | 3 | 1 | - | - | - |
| Plastic-metal | - | - | 1 | 3 | 2 | - | - | - |
| Plastic-glass | - | - | 1 | 3 | 2 | - | - | - |
| Patterned sheets | ||||||||
| Almost flat | 2 | - | - | - | 5 | 4 | 1 | 3 |
| Moderate draw | 2 | - | - | - | - | 3 | 4 | 1 |
| Deep draw | - | - | - | - | - | 2 | - | 1 |
| Scenic applications | ||||||||
| Flocking/grasses | - | - | - | - | 1 | - | - | 2 |
| Tree foliage | - | - | - | - | - | 2 | - | 1 |
| Ground cover | - | - | - | - | 1 | - | - | 2 |
| Grass mat | - | - | - | - | 2 | - | 1 | - |
|
Note: We do not warrant in any way that the adhesive materials mentioned here will perform in your specific application. For information purposes only. |
||||||||